
Sourdough English Muffins
This is a stunning sourdough English Muffin recipe which has been on this site for years. We've just taken another shot at it to clarify instructions and measurements. The taste of these muffins is awesome! My son, who was about 10 when we first made these and who didn't like English Muffins, had three of them for breakfast. The next day we made Eggs Benedict, and he announced he liked the English Muffins better 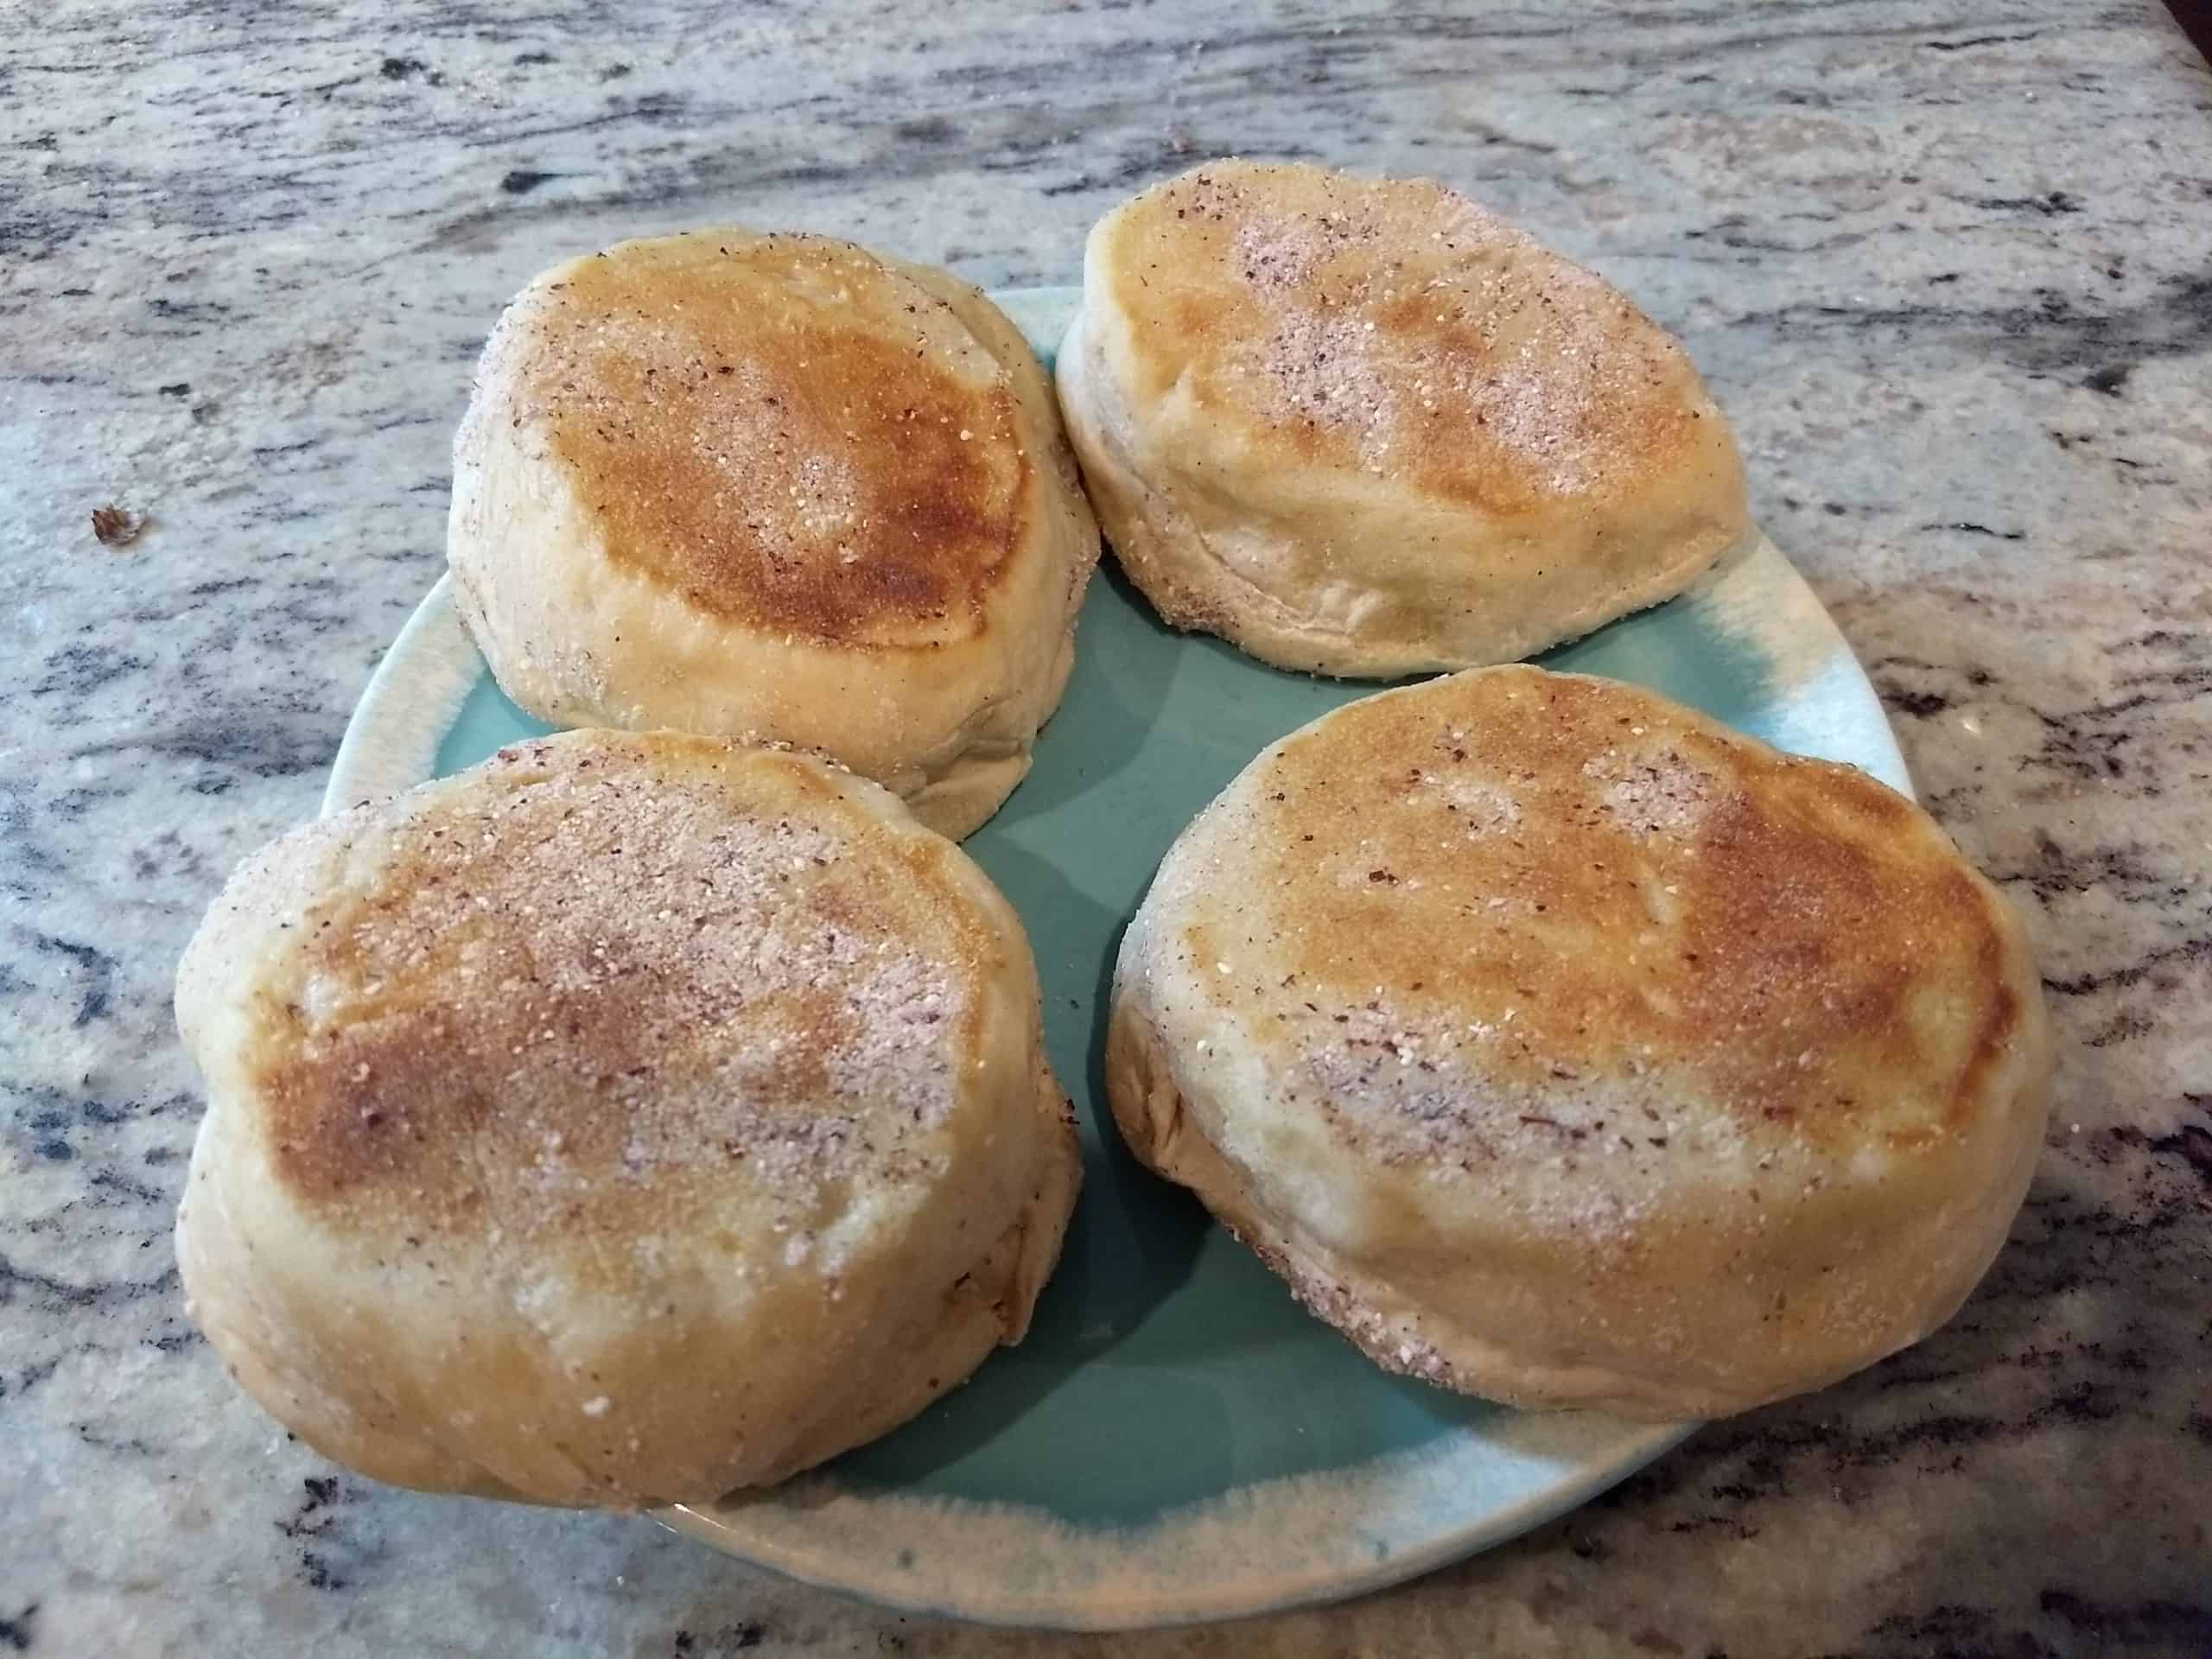 "without all that stuff on them". He is now 31 and in a recent conversation commented that an English Miuffin dresses up any breakfast. See - they DO grow up!
The picture we used to have here showed some sadly burned English Muffins. In later years, I've learned that you don't have to turn the skillet up to forest fire strength to cook the muffins! Now, I'm using more reasonable temperatures. More on that below. The home made ones are SO much better than the store bought! We are quite sad when we run out.
This started as a recipe from: Bake Your Own Bread By Stan & Floss Dworkin and should make about a dozen English muffins, depending on how large a muffin you cut out of the dough.
Most of the work is done the night before, so you can probably serve (or just eat) these about 2 hours after you get started on the second part.
The Night Before:
| Volumetric Measure (Cups) | Ingredient | Grams | Baker's Percentage (4) |
|---|---|---|---|
| 1 Cup | Starter | 260 Grams | 50% |
| 2 TBSP | Honey | 42 Grams | 8% |
| 2 Cups | Milk (1) | 484 Grams | 93% |
| 4 Cups | Unbleached All-Purpose Flour | 520 Grams | 100% |
- I prefer fresh, whole milk. You may use lower fat milks or non-dairy milks, but they won't be the same. We tried reconstituted instant milk, and they were never as good, having a cooked milk flavor.
Mix starter, honey and milk in mixing bowl until smooth. Add the flour, 2 C at a time, and mix in. There's no need for gluten development now, so do not whip-just get all the flour thoroughly wet. Cover with clean towel and leave at room temperature in a draft free place.
The Next Morning: Sprinkle:
| Volumetric Measure (Cups) | Ingredient | Grams | Baker's Percentage (4) |
|---|---|---|---|
| 1 tsp | Baking Soda | 4 Grams | 3% |
| 2 tsp | Salt | 12 Grams | 9.2% (1) |
On top of the starter that you allowed to rise overnight.
- The amount of salt seems high, but remember there's a LOT of flour in the previous night's starter. When you consider all the flour, it is closer to 1.5% salt, which is very reasonable.
Stir down mixture from last night (it will have risen considerably), mixing in the baking soda and salt you just sprinkled on the starter. If the starter rose too high and fell, that's not a problem, just stir down the rest of the way.
Now you need to add:
| Volumetric Measure (Cups) | Ingredient | Grams | Baker's Percentage (4) |
|---|---|---|---|
| 1 Cup | Unbleached all-purpose flour | 130 Grams | 100% |
Flour your work surface with the flour (you may use twice as much as listed, if needed) and knead until the dough is medium stiff - enough to roll out. Once you have enough flour in (I go by feel-never too dry and always moist) and the dough no longer sticks to your hands, give it another 5 minute kneading.
Line 2 baking sheets or jelly roll pans with baker's parchment and then generously sprinkle with corn meal. The corn meal is essential to keep the muffins from sticking, so be generous!
Flour your work surface again and lightly roll dough to  about 1/2-inch thick. Take a 3 inch round cutter (a bit larger diameter and different shapes are OK) and cut as many rounds as you can. As you cut the rounds, transfer them to the sheet pans. We tried cutting as many as we could and then transferring them, but we tended to mangle the muffins. Don't twist the muffin cutter as that will make them lopsided. The best bet is to move the cutter in a circle to separate the muffin from the dough mass.
Roll the left over dough out and cut more until the dough is all used up. Try to keep them very uniform in thickness and diameter.
Again, as you cut each round, place on the bakers parchment which has been sprinkled with corn meal - don't allow raw muffins to touch- they WILL stick to each other. When all rounds are cut, sprinkle corn meal over tops of muffins. Cover each pan with cling wrap to keep the dough from drying out.
Allow to rise in warm place, covered, for about an hour or until risen again. This is a great place to do any other breakfast preparations, or go take the shower you put off so you could start making the muffins for breakfast.
Now Comes The FUN Part! Preheat a griddle - I like a non-stick electric griddle for this - and grease it with with a TINY bit of butter, until butter sizzles. With our electric griddle, I used 300 and 325F (150 and 163C) If you are using a skillet or griddle on a gas range, use a low flame.
The idea is to set the heat so the inside of the muffin bakes and outside does not burn but browns nicely. Cook one side for about 4 to 5 minutes and turn.
Some people suggest squishing the muffin down a bit with a spatula after flipping it - but I don't think that's a good idea. Try doing it and not doing it and see which you prefer.
In any case, cook the flipped side for about 4 to 5 minutes. If you can manage this, turn only once so try to be sure the one side is cooked before turning. While you can skip the butter if you have a non-stick skillet, they won't taste as good without it!
As the muffin cooks, you might gently press on it with a finger to see if it is done. If the side pushes out like a thick liquid, it's not done. You may need to play with the time and temperature to get them where you want them. Remember, an English muffin should be underdone a bit so they can finish cooking in a toaster or a skillet swimming in butter. It takes practice to nail it.
Also remember the thermostat on griddle may not be all that accurate. You may need to play with the time and temperature to make the English Muffins you want.
While the muffins taste great, they don't have the texture I usually associate with English Muffins - no big holes. I figure, maybe it's me, so I'm still working on it. A number of emails in regards to this recipe say, "don't be in a hurry, let the muffins rise a bit longer and you'll get the big holes you're looking for!" Another message I received was from an English lady who told me that in England the muffins don't have holes as large as I seem to be expecting, so the muffins are probably right on target. A friend warns me to NEVER, EVER cut the muffins with a knife! They must be separated into two halves using a fork. I've done it both ways and (sorry Freddy) don't see any real difference.
As teenagers say, "whatevs". They taste great!
Yum! Have used this recipe three times. Got a great new starter from my SIL for Christmas. Delicious. I always get about 2 dozen muffins using a 2.5 inch old fashioned glass as a cutter. My first step was closer to 20 hours. Yes, there are holes.
Hi Brenda,
I suspect I was too impatient. Glad you got the holes, and that the muffins are delicious!
-Mike
Do you think the holes are from the additional time in the first step, or would it be from giving them enough time just before cooking, or maybe both? hmmmm.
Yes! The first step helps get the dough nice and active, the second is where the holes are formed. Without the first, the dough will be too weak to get holey.
-Mike
If I could load a picture I would. They turned out great. The over night rise collapsed on itself, so that was plenty, and I had to leave the uncooked English muffins longer than I wanted to because I was in the middle of something else I couldn’t leave, but the result was perfect! Great holes about half as big as grocery store kind, but the best I’ve ever gotten when making homemade. I cooked at 250 until nicely golden on both sides and finished in the oven at 350 for about 5-10 minutes. I’m thrilled! Best English Muffins yet and even better they are sourdough!!
Thank you for all the information and recipes you have here, I’ve been following your guidance on and off for 10 years and finally have developed some skill with sourdough! 💖
Can I bake it as a loaf?
Hi Elpida,
Yes, you can bake this as a loaf. However, it would be easied to just use one of the two English Muffin Loaf recipes we have here on the site. One is a Yeast based English Muffin Loaf recipe that is part of our Introduction to Bread Making. The other is a sourdough English Muffin Loaf that is part of our Fast Track to Sourdough Tutorial.
Best wishes,
-Mike
This is my absolute favorite recipe. I’ve used it since my kids were little and this was the only sourdough site on the internet. I even used the recipe to make English Muffins for the fair and was invited to do live demos. Thank you so much for sharing all of your knowledge!
Hi Heidi,
Thanks for the kind words – the English Muffin recipe is one of my favorites and it delights me that you like it also!
Best wishes,
Mike
Hi Mike,
I have used this recipe all summer long since my oven died and has been the family go to bread even after we had the oven fixed! We love this bread and I attempted to bake the muffins instead of frying them and that worked out too with them getting nice and thick. They are usually all gone (approx 22-24) muffins in less than a week in a family of 6 grown adults. Thank You!
Hi Debbie,
That’s great to hear! Here’s a trick a friend showed me if you want to bake them rather than griddle them, he went to the hardware store and got 4(*) 1″ diameter copper fittings (https://www.homedepot.com/s/straight%2520copper%2520fitting?NCNI-5) about the height he wanted to make his English Muffins. He used them as spacers between the sheet pan he had the muffins on and another pan he put above them. This gave the muffins better browning and baking.
Best Wishes,
-Mike
(*) That would be 4 spacers per sheet pan he plans on using, of course. -M
Thanks Mike for the great idea. I asked my son if he like the muffins baked and he said he prefers the buttery flavor. Oh well I can’t make every one happy. They still taste great to me.
It’s traditional to slightly underbake English Muffins so you can toast them and butter them, or split them with a fork and broil them in butter. Baking them shouldn’t rib them of buttery flavor. The two sheet pan trick is a way of getting the griddled taste and texture with a bit less hassle.
-Mike
I’ve been making your version of these muffins for four or five years, and they are always a hit with the family. I’ve found that the longer you let them rise before the griddle, the bigger the holes. I usually let them go for 2.5 to 3 hours.
I like semolina rather than corn meal, but that’s just my taste talking.
Thanks for a great recipe!
Hi Gary,
I’ve had better results than I show in the photographs… I should update the pictures!
I’m glad you have used semolina rather than corn meal – I keep telling people,”It’s not YOUR recipe until you change it!” Some folks seem to think the recipe came down the mountain carved in stone. Nope. Not in the least. Recipes are just one person’s attempt to share what they have done.
Best wishes,
-Mike
well the first time i made these using the starter method and working it till it was ready…. was fourteen years ago and one month
…. this recipe is by FAR THE BEST EVER STILL MADE THEM TONIGHT love love love love love this delicious…..
Thanks for the kind words! This recipe has a number of fans, we make large batches and freeze them so we don’t run out.
-Mike
About 15 years ago I learned how to create a sourdough starter and started to learn how to bake bread from the great info on your site. Just recently i came across the muffin recipe and love it. So easy and yummy. I keep a batch of muffins in the freezer so I’m never out.
Thanks so much!
Hi Claire,
Thanks for the kind words! Like you, we love the flavor of these muffins!
Best wishes,
Mike